| 일 | 월 | 화 | 수 | 목 | 금 | 토 |
|---|---|---|---|---|---|---|
| 1 | 2 | 3 | ||||
| 4 | 5 | 6 | 7 | 8 | 9 | 10 |
| 11 | 12 | 13 | 14 | 15 | 16 | 17 |
| 18 | 19 | 20 | 21 | 22 | 23 | 24 |
| 25 | 26 | 27 | 28 | 29 | 30 | 31 |
- ButterKnife
- Picasso
- VMware
- Glide
- AWS
- 이미지로딩 라이브러리
- Mac
- 안드로이드
- Logcat
- 안드로이드 스튜디오
- 라이브러리
- 커스텀뷰
- OTTO
- 안드로이드 라이브러리
- 아마존웹서비스
- Today
- Total
박상권의 삽질블로그
[안드로이드/Android]CustomView를 만들어서 재사용하기 본문
안드로이드 개발자들이 모여있는 오픈채팅방에 참여해보세요 .
Q&A 및 팁을 공유하는 방입니다..
오픈채팅방 참여
블로그를 Medium으로 옮겨서 운영하고 있습니다.
앞으로 새로운 글은 모두 미디엄 블로그를 통해서 올릴 예정입니다.
미디엄에서 다양하고 유익한 포스팅을 살펴보세요
미디엄 블로그 보기
이번에 '클린 아키텍처'를 주제로 온라인 강의를 개설하게 되었습니다 🎉
평소 오픈채팅방이나 여러 커뮤니티에서 '클린 아키텍처'와 관련된 질문들이 많았는데요. 이를 해결해줄 수 있는 마땅한 강의가 없었던것 같습니다.
평소 '클린 아키텍처' 에 대한 궁금증이나 관심이 있으셨던 분들이 수강해보시면 도움이 될것 같아요
강의 살펴보기
이전 포스팅에서 Style테마를 이용하여 일정한 레이아웃의 속성을 만들고 이를 재사용하는 방법에 대해서 알아 보았습니다.
[안드로이드]style테마 활용으로 노가다코딩 줄이는 방법
이 방법보다 좀더 심화된 방식인 Custom View를 만드는 방법에 대해서 포스팅 해보겠습니다.
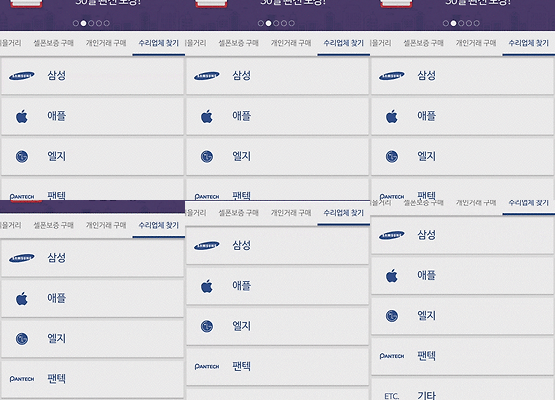
먼저 아래 사진을 예로 들어보겠습니다.
로그인버튼이 각각 3개씩 있는 레이아웃입니다.
잘 보면 3개의 버튼이 레이아웃 구성이 똑같은걸 알 수 있습니다.
기본적인 로그인보튼의 형태는 같지만 아이콘, 텍스트, 배경색상, 텍스트 색상등은 서로 다른것을 확인할 수 있습니다.
각각의 버튼 layout은 아래와 같을 것입니다.
<?xml version="1.0" encoding="utf-8"?>
<LinearLayout xmlns:android="http://schemas.android.com/apk/res/android"
    android:id="@+id/bg"
    android:layout_width="match_parent"
    android:layout_height="55dp"
    android:background="@drawable/login_kakao_bg"
    android:gravity="center"
    android:padding="10dp">
    <!-- android:background="@drawable/kakao_login_button_background" -->


    <ImageView
        android:id="@+id/symbol"
        android:layout_width="wrap_content"
        android:layout_height="32dp"
        android:layout_gravity="center_vertical"
        android:layout_marginLeft="20dp"
        android:src="@drawable/login_kakao_symbol"

        />


    <TextView
        android:id="@+id/text"
        style="@style/CustomText_Subhead"
        android:layout_width="0dp"
        android:layout_height="match_parent"
        android:layout_weight="1"
        android:gravity="center"
        android:text="카카오톡 로그인"
        android:textColor="@color/kakao_brown"
        android:textStyle="bold" />

</LinearLayout>
위의 화면처럼 버튼이 3개라면 저 레이아웃 소스코드를 3번 복사/붙여넣기 해서 장문의 레이아웃을 만들겠죠...
만약에 버튼이 10개라면? 100개라면??
그러다가 padding값을 10dp에서 16dp로 바꾸고싶다면??
상상만 해도 끔찍합니다.(복사 붙여넣기보다 더 무서운게 그것들을 전부다 한땀한땀 수정하는 작업이겠죠...)
이러한 경우는 앞서배운 style테마를 이용하는것보다 CustomView를 만들어서 이를 재사용하는것이 좋습니다.
우리는 로그인버튼의 레이아웃형태는 그대로 유지하고 아이콘과 텍스트만 변경하고 싶습니다.
결론적으로 만들어진 CustomView를 사용하면 아래와 같이 사용할 수 있습니다.
우선 미리 완성된 CustomView의 사용예제를 살펴보겠습니다.
<kr.co.selphone.welcome.login.CustomLoginButton
    android:id="@+id/login_kakao"
    style="@style/LoginButtonStyle"
    app:bg="@drawable/login_kakao_bg"
    app:symbol="@drawable/login_kakao_symbol"
    app:text="카카오톡"
    app:textColor="@color/kakao_brown"

    />
custom하게 만든 속성을 이용해서 배경색, 아이콘 이미지, 텍스트, 텍스트 색상 등을 지정할 수 있습니다.
위의 3개의 서로다른 로그인버튼을 만들고자 하는경우는 아래와 같이 사용해 주면 됩니다.
<kr.co.selphone.welcome.login.CustomLoginButton
    android:id="@+id/login_kakao"
    style="@style/LoginButtonStyle"
    app:bg="@drawable/login_kakao_bg"
    app:symbol="@drawable/login_kakao_symbol"
    app:text="카카오톡"
    app:textColor="@color/kakao_brown"
    />

<kr.co.selphone.welcome.login.CustomLoginButton
    android:id="@+id/login_naver"
    style="@style/LoginButtonStyle"
    app:bg="@drawable/login_naver_bg"
    app:symbol="@drawable/login_naver_symbol"
    app:text="네이버"
    app:textColor="@color/white"
    />

<kr.co.selphone.welcome.login.CustomLoginButton
    android:id="@+id/login_google"
    style="@style/LoginButtonStyle"
    app:bg="@drawable/login_google_bg"
    app:symbol="@drawable/login_google_symbol"
    app:text="구글"
    app:textColor="@color/google_red"
    />
복잡한 레이아웃 구성도 하나의 CustomView로 만들어준뒤 해당 CustomView를 재사용하면 편리하고 유용하게 화면을 구성할 수 있습니다.
CustomView 만들기
1. layout xml파일 생성
CustomView의 기본으로 쓰일 layout xml파일을 만들어 줍니다.
2. attrs.xml 설정
custom하게 만들어줄 attribute를 설정해줍니다.
value -> attrs.xml 파일에 아래 내용을 추가해줍니다.(만약 해당 파일이 없다면 만드시면 됩니다.)
<declare-styleable name="LoginButton">
    <attr name="bg" format="reference|integer" />
    <attr name="symbol" format="reference|integer" />
    <attr name="text" format="reference|string" />
    <attr name="textColor" format="reference|integer" />
</declare-styleable>
이 attr 속성을 보았을때 4가지를 속성값으로 받아서 적용할 수 있게 할것입니다.
<attr name="text" format="reference|string" />
이 attr은 나중에 app:text="....." 로 쓰일수 있으며 '가나다라' 같은 직접적인 String과 @string/aaaa 같은 reference를 넣어줄 수 있습니다.
3. CustomView 만들기
(클래스 전체 소스는 아래에 있습니다)
1) CustomView의 생성자에서 initView, getAttrs 함수를 사용합니다
public CustomLoginButton(Context context) {
    super(context);
    initView();

}

public CustomLoginButton(Context context, AttributeSet attrs) {
    super(context, attrs);
    initView();
    getAttrs(attrs);

}

public CustomLoginButton(Context context, AttributeSet attrs, int defStyle) {
    super(context, attrs);
    initView();
    getAttrs(attrs, defStyle);

}
2) initView()에서는 미리 만들어둔 xml 파일을 할당해주고 각각의 View를 설정해줍니다.
private void initView() {

    String infService = Context.LAYOUT_INFLATER_SERVICE;
    LayoutInflater li = (LayoutInflater) getContext().getSystemService(infService);
    View v = li.inflate(R.layout.welcome_login_button, this, false);
    addView(v);

    bg = (LinearLayout) findViewById(R.id.bg);
    symbol = (ImageView) findViewById(R.id.symbol);

    text = (TextView) findViewById(R.id.text);

}
3) getAttrs() 및 setTypeArray()함수에서는 우리가 attrs.xml 에 선언해둔 attribute를 이용하여 이를 각각의 View에 설정해주는 작업을 합니다.
private void getAttrs(AttributeSet attrs) {
    TypedArray typedArray = getContext().obtainStyledAttributes(attrs, R.styleable.LoginButton);

    setTypeArray(typedArray);
}


private void getAttrs(AttributeSet attrs, int defStyle) {
    TypedArray typedArray = getContext().obtainStyledAttributes(attrs, R.styleable.LoginButton, defStyle, 0);
    setTypeArray(typedArray);

}


private void setTypeArray(TypedArray typedArray) {


    int bg_resID = typedArray.getResourceId(R.styleable.LoginButton_bg, R.drawable.login_naver_bg);
    bg.setBackgroundResource(bg_resID);

    int symbol_resID = typedArray.getResourceId(R.styleable.LoginButton_symbol, R.drawable.login_naver_symbol);
    symbol.setImageResource(symbol_resID);

    int textColor = typedArray.getColor(R.styleable.LoginButton_textColor, 0);
    text.setTextColor(textColor);

    String text_string = typedArray.getString(R.styleable.LoginButton_text);
    text.setText(text_string);


    typedArray.recycle();

}
아래는 CustomLoginButton의 전체 소스코드 입니다
이렇게 완성된 CustomView를 사용하고자하는 xml에서 아래와 같이 재사용해주면 됩니다.
물론 여러번 재사용할때도 CustomView을 사용하고 각각 bg,symbol,text,textColor에 맞는 값을 넣어주시면 됩니다.
<kr.co.selphone.welcome.login.CustomLoginButton
    android:id="@+id/login_kakao"
    style="@style/LoginButtonStyle"
    app:bg="@drawable/login_kakao_bg"
    app:symbol="@drawable/login_kakao_symbol"

    app:text="카카오톡"
    app:textColor="@color/kakao_brown"

    />
위의 예재대로 그대로 따라해보시고 CustomView를 만드는 원리에 대해서 이해하셨다면 충분히 이를 응용해서 원하시는 CustomView를 만드실 수 있을겁니다.
이상 CustomView를 만들어서 재사용하는 방법에 대해 소개 해드렸습니다.
감사합니다.
'IT > Android-TIP (한글)' 카테고리의 다른 글
| [안드로이드/Android]Fragment에서 Activity의 onActivityForResult 받는 방법 (0) | 2015.11.30 |
|---|---|
| [안드로이드/Android]CoordinatorLayout Behavior를 이용해 FooterView 숨기기/보여주기 (5) | 2015.11.25 |
| [안드로이드/Android]style테마 활용으로 노가다코딩 줄이는 방법 (0) | 2015.10.29 |
| [안드로이드/Android]유용한 라이브러리 - Glide-Transformations(이미지 변형) (1) | 2015.10.16 |
| [안드로이드/Android]Debug/Release에 따라 다른 Google API KEY 넣기 (0) | 2015.08.28 |


